Wednesday, January 25, 2023

Can't create a Teams Meeting in Outlook


Can't create a Teams Meeting in Outlook because the Teams Meeting add-in has become disabled


Fix the issue manually

If you’d like to perform the checks and make the fixes manually, do the following:

  • If the users are running Windows 10, install the Update for Universal C Runtime in Windows. This update is required for the Teams Meeting add-in to work.

  • Verify that the users have the Teams desktop client installed. The meeting add-in can’t be installed when using only the Teams web client.

  • Verify that the users are running Outlook 2013 or later.

  • Verify that all available updates for the Outlook desktop client have been applied.

  • Exit Outlook.

  • Exit Teams.

  • Run one of the following commands that’s appropriate for your Office installation to re-register Microsoft.Teams.AddinLoader.dll:

    • 64 Bit Office: %SystemRoot%\System32\regsvr32.exe /n /i:user %LocalAppData%\Microsoft\TeamsMeetingAddin\1.0.18012.2\x64\Microsoft.Teams.AddinLoader.dll

    • 32 Bit Office: %SystemRoot%\SysWOW64\regsvr32.exe /n /i:user %LocalAppData%\Microsoft\TeamsMeetingAddin\1.0.18012.2\x86\Microsoft.Teams.AddinLoader.dll

    Note There might be multiple folders with the same version number under \TeamsMeetingAddin. Select the folder with the highest build number.

  • Restart the Teams desktop client.

  • Sign out and then sign into the Teams desktop client.

  • Restart the Outlook desktop client and make sure that Outlook isn't running in admin mode.

Check the status of the add-in in Outlook

If you still don't see the Teams Meeting add-in, make sure it's enabled in Outlook.

  • In Outlook, select File > Options.

  • In the Outlook Options dialog box, select the Add-ins tab.

  • Check whether Microsoft Teams Meeting Add-in for Microsoft Office is listed in the Active Application Add-ins list.

  • If the add-in is not listed in the list of active applications, and you see the Teams Meeting Add-in listed in the Disabled Application Add-ins list, select Manage > COM Add-ins and then select Go…

  • Select the checkbox next to Microsoft Teams Meeting Add-in for Microsoft Office.

  • Select OK on all the dialog boxes that are open and restart Outlook.

    Note:- Re-installation MS teams also help.


Copy Folders and Subfolders Using Xcopy Command

 Copy Folders and Subfolders Using Xcopy Command

1. copy folders and subfolders and contents

1. Click Start and type cmd in the search box. Right-click Command Prompt from the result list and select Run as administrator. Or you can press Win + R to call up Run window, and type "cmd" in the textbox to directly run it.

2. Now, when you're in the Command Prompt, you can type Xcopy command as below to copy folders and subfolders including contents. For example, you want to copy “test” folder and its subfolders on C drive to D drive, type Xcopy command as:

Xcopy C:\test D:\test /E /H /C /I

Xcopy Command

  • /E – Copy subdirectories, including any empty ones.

  • /H - Copy files with hidden and system file attributes.

  • /C - Continue copying even if an error occurs.

  • /I - If in doubt, always assume the destination is a folder. e.g. when the destination does not exist.

Notes:

  • Xcopy will not copy open files.

  • Xcopy doesn’t display any progress or completed operations information when executed.

  • Remember that for folders with spaces in the name or folders larger than 8 characters in length, it is a good idea to put quotation marks around the path or you may get an error.

Situation 2. copy folders and subfolders without files

You can open the Command Prompt according to the steps shown above. Then, type the Xcopy command as below to copy folders and subfolders without files:

Xcopy Source Destination /T /E

  • /T - Copy the subdirectory structure, but not the files.

  • /E - Copy subdirectories, including any empty ones.

Situation 3. copy folders and subfolders with NTFS and Share permission

Sometimes, you may need to transfer the NTFS and Share permission together with your folders.

Once the Command Prompt is open, you can then type the following Xcopy command to copy all files and folders and retain its NTFS and Share permissions.

Xcopy Source Destination /O /X /E /H /K

  • /E - Copy folders and subfolders, including empty ones.

  • /H - Copy hidden and system files also.

  • /K - Copy attributes. Typically, Xcopy resets read-only attributes.

  • /O - Copy file ownership and ACL information.

  • /X - Copy file audit settings (implies /O).

Actually, there are many parameters of Xcopy command, and you can combine different parameters for different situations. But if there is a slight error in the command, the copy operation may fail, and even lead to data loss. Therefore, you must be very careful when using Xcopy command.

Troubleshoot no “Switch User” option in Windows 10/11?

Troubleshoot no “Switch User” option in Windows 10/11?

First Method:- Configure Windows Group Policy

  1. Press the Windows Key and R simultaneously, type in or paste “msc” (no quotes) in the Run dialog box and hit Enter.
  2. The Local Group Policy window should appear next. Follow this path:

Computer Configuration > Administrative Templates > System > Logon

  1. Double-click “Hide Entry Points for Fast User Switching” to open it.
  2. Select Disabled to turn it on.
  3. Click Apply > OK.
  4. Exit the Local Group Policy Editor window and check if the Switch User option is back.

2nd Method:- Edit the Windows Registry

Keep in mind that applying changes to the Windows Registry can be risky. Therefore, follow the steps below carefully and only make the changes as outlined. We recommend that you first create a backup of your registry to make it easy to restore it in case something goes wrong.

Backing up your registry on Windows 10/11 is quite simple. Here’s the guide:

  1. Go to your Start menu, type in “regedit” (no quotes), and press Enter.
  2. Right-click the first option – Registry Editor – and select Run as administrator.
  3. Click Yes when you get the system prompt.
  4. Select File > Export and pick the location where you want to save the backup file.
  5. Assign the file a name, and make sure to select the All option under Export Range.
  6. Click on Save.

Once you’re done, here’s how to enable another user in Windows 10/11 through the registry:

  1. Launch the Registry window once again and expand the following path:

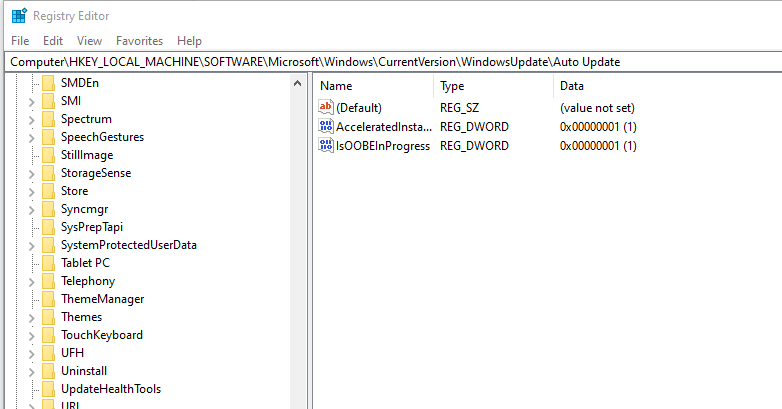
Computer\\HKEY_LOCAL_MACHINE\\SOFTWARE\\Microsoft\\Windows\\CurrentVersion\\Policies\\System

  1. Once you get to this location, search for a value labeled “HideFastUserSwitching”. If it doesn’t exist, you can quickly create one. To do so, right-click the System folder and select New > DWORD (32-bit) Value. Type the name “HideFastUserSwitching” (no quotes) and press Enter. This will create the value.
  2. Next, double-click the HideFastUserSwitching value and set the Value Data to 0 (zero) to enable it.

That should do it. Now, press the Windows logo on your keyboard and click on your user icon to check if this fix resolved the no Switch User option in your Windows 10/11 computer.


SPSS-side-by-side configuration is incorrect


SPSS Statistics error at launch: The application has failed to start because its side-by-side configuration is incorrect.

Troubleshooting

Problem

IBM SPSS Statistics on a Windows Vista or later operating system may presents at least one of the following error messages on startup: Message 1: The application has failed to start because its side-by-side configuration is incorrect. Please see the application event log for more detail. Message 2: The application was unable to start correctly (0xc0150004). The SPSS Statistics software will not start.

Cause

The behaviors are the result of a incorrect and/or missing the C++ Runtime component for your type of system. (x86 or x64). SPSS Statistics ships with the required version of the Microsoft Visual C++ Redistributable libraries needed, but they were unable to be installed. The most likely cause is not having the correct write file permissions, the installation did not complete, or the installation was terminated early.

Environment

Windows Operating Systems: Windows Vista or later.

Resolving The Problem

The following procedure requires administrator privileges/credentials to complete.

1) Open Windows Explorer.

2) Navigate to the directory corresponding to your software products version (vernum).
Replace '<vernum> with the version number of your product (i.e. 20, 21, 22, 23, 24, 25, 26, etc). The default directory for version 26 is:

C:\Program Files\IBM\SPSS\Statistics\Vernum

3) Open the 'VC9' folder.

4) In the folder will be an executable file (ending in .exe) called either vcredist_x86.exe or vcredist_x64.exe, depending on the version of SPSS Statistics installed.

*32-bit version of Statistics installed on 64-bit Windows operating system*
C:\Program Files (x86)\IBM\SPSS\Statistics\<vernum>\VC9\vcredist_x86.exe

*32-bit version of Statistics is installed on a 32-bit Windows operating system*
C:\Program Files\IBM\SPSS\Statistics\<vernum>\VC9\vcredist_x86.exe

*64-bit version of Statistics is installed on a 64-bit Windows operating system*
C:\Program Files\IBM\SPSS\Statistics\<vernum>\VC9\vcredist_x64.exe

Run this file as Administrator by right-clicking on the file and selecting 'Run as administrator'. If 'Run as administrator' is grayed out or you do not have the administrator password when asked, please have local IT department complete the installation or have them grant you the correct administrator privileges.

5) The Microsoft Visual C++ Redistributable libraries will now begin to install. Installation may take a few minutes. .

6) Once the installation is complete, close all open windows and launch the Statistics software. The Statistics software should now start normally without the 'side-by-side' error message.


Thursday, September 19, 2019

DNS_PROBE_FINISHED_BAD_CONFIG Error {Solved}

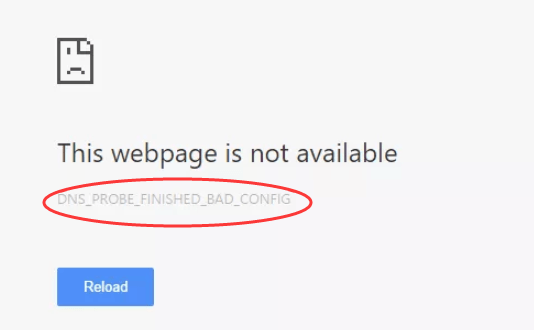
The DNS_PROBE_FINISHED_BAD_CONFIG error can be settled effortlessly despite the fact that you have no clue why this error happened. In case you can’t associate with web because of error DNS_PROBE_FINISHED_BAD_CONFIG, which recommends a DNS related error, don’t stress. This is a DNS related error. In the event that web association isn’t working legitimately, or if DNS server isn’t reacting, this error would happen. Adhere to directions underneath then you can get to the sites once more.
When you get this error, the main basic thing you can do is restart the device. No further advances are required. Restart your device and verify whether the issue is settled.
Image result for DNS_PROBE_FINISHED_BAD_CONFIG Error
In the event that that doesn’t resolve the issue, attempt underneath techniques given:

Dns_probe_finished_bad_config Fix#1:

Windows and other working systems store DNS information in the reserve, so you can quickly access the site you visited previously. Be that as it may, if the IP address of the site is transformed, you can’t get to the site and will get DNS related errors like DNS_PROBE_FINISHED_BAD_CONFIG. To settle this error, you can attempt to flush the DNS reserve and recharge IP address.
  • Press Win+R to conjure the run box.
  • Type cmd to open Command Prompt.
  • Type ipconfig/discharge and press the Enter.
  • Type ipconfig/flushdns and press the Enter.
  • Type ipconfig/reestablish and press the Enter.
  • Check to check whether the issue is settled.

Dns_probe_finished_bad_config Fix#2:

On the off chance that the above technique doesn’t work, you can endeavor to change the DNS server. When you interface with the web, your ISP (Internet Service Provider) will allocate you a DNS server naturally. when you get the DNS_PROBE_FINISHED_BAD_CONFIG error, your current DSN server is probably going to have issues. So you can change the DNS server to an accessible DNS server. You can discover free DNS servers by google seek with keyword “free DNS server”. I suggest utilizing Google’s open DNS server, which is protected and stable.
  • Press the Win+R to conjure the run box.
  • Sort control panel to open Control Panel.
  • Click Network and Sharing Center then Change connector settings.
  • Right-click the issue organize (If the system is having an issue, you may a red X check on the symbol.), and select Properties.
  • In the Networking tab, high light thing Internet Protocol Version 4 (TCP/IPv4) and click the Properties button.
  • Under “Utilize the accompanying DNS server addresses”, set the DNS server to another accessible server. The suggested DNS server is Google’s open server: 8.8.8.8 and 8.8.4.4.
  • You can set Preferred server as 8.8.8.8 and set Alternate server as 8.8.4.4. And click OK.
  • Verify whether the issue is settled.

Wednesday, July 10, 2019

ipconfig in command it shows “ipconfig is not recognized as internal or external command

Hi Guys,

Here is the solution:-

It could indeed be down to system variables.

  • Right click My Computer in Start Menu or on desktop and click Properties
  • Choose Advanced System settings -> Advanced then Click the Environment Variables button Find the system variable called Path and click it.
  • Click Edit button


    It should be a long string with several paths separated by a semi-colons ;. Check it contains C:\Windows\system32 (I'm assuming your system drive is C). If you not sure if it is correct then you might want to copy it and post it here. If you make changes you may need to restart to see any effect. If this doesn't help then open your C:\Windows\system32 directory and ensure it contains IPConfig.exe. If it doesn't then I guess you must be missing system files.

Monday, July 1, 2019

No login screen appearing in window 10

Hi Guys,

I hope you all well, No login screen appearing in window 10


There is question for you , No login screen appearing in window 10 after starting the window but we are easily able to login in safe mode.


About each and every thing we done except window formation and reset the PC.


Any body have proper solution or proper answer for resolve the same.

Please comments us:-